Creating an Avatar
Virtual Visit’s multi-user capability allows your group in a computer lab, or in any other setting where you have access to a computer, to see others in the virtual environment. Create a customized character, or avatar, and select a name for it from a list (listed names appear as a visitor starts to type in letters). When your avatar enters the virtual Legislature, you may find other avatars in the building that represent other people who have also started a Virtual Visit from their computers.
Choose an Avatar
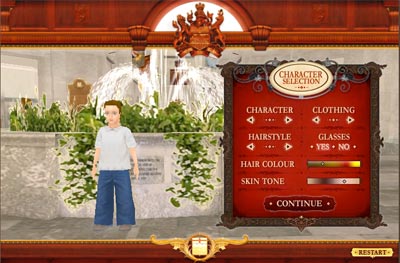 |
Start by choosing an avatar and deciding how you want it to look. You will see the avatar change to reflect the choices you make.
- Use the arrows to cycle through a variety of avatars.
- Use the arrows to cycle through clothing styles.
- Use the arrows to cycle through hairstyles.
- Click Yes or No to decide if your avatar will wear glasses.
- Click on a colour or drag the plus marker to change the colour of your avatar's hair.
- Click on a colour or drag the plus marker to change the tone of your avatar's skin.
|
Name Your Avatar
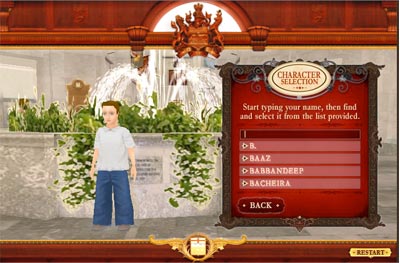 |
After choosing your avatar and clicking on continue you must give your avatar a name.
- Start typing a name, and you will see choices appear in the list.
- The more letters you type, the more accurate the choices will become.
- To proceed, click on one of the choices in the name list.
- If you don't see the name you want, choose a name from the list that is close to it.
- When you have clicked on a listed name, a Continue button will appear. Click the button to begin your Virtual Visit!
|
|